Azure Repos
How to connect a Polaris project to a repository in Azure DevOps.
Prerequisites
Create a personal access token
Authentication between Azure Repos and Polaris is managed with a personal access token (PAT) that you create in Azure DevOps. If you haven't done so already, follow the instructions in the Azure DevOps documentation to create an access token: Use personal access tokens > Create a PAT.
Important: To use Event-Based Test Automation in Polaris for SCM Integrations and Synchronizing Polaris with your SCM Provider, the token you use has different
requirements, see Azure Tokens for SCM Bulk Integration and/or Monitoring.
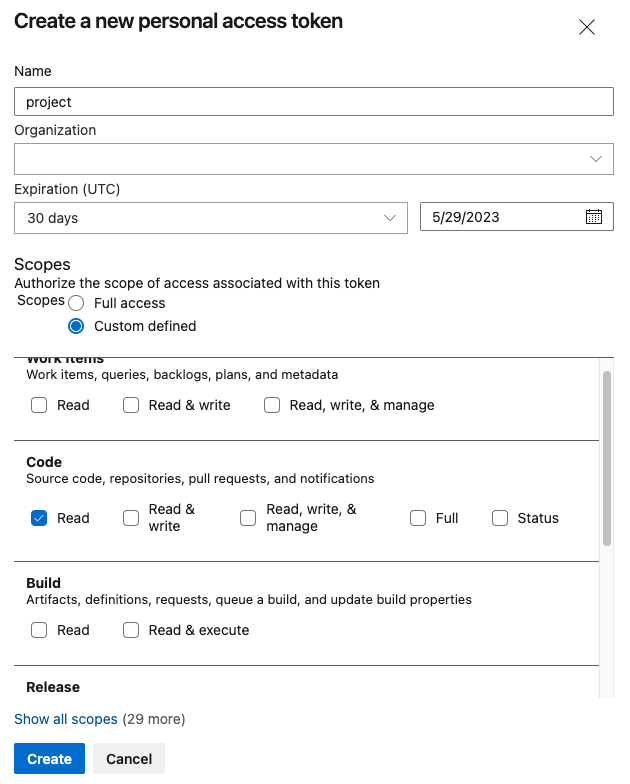
When creating an access token:
- From Settings pulldown, select Personal Access Token.
- Click +New Token.
- Enter a Name for the token and select your Organization.
- Set the token's expiration date.
- Enable the Read scope (under Code).
Important: Store your token in a secure location. Each time you modify a project's SCM integration, you'll need to reenter the token to save your changes.
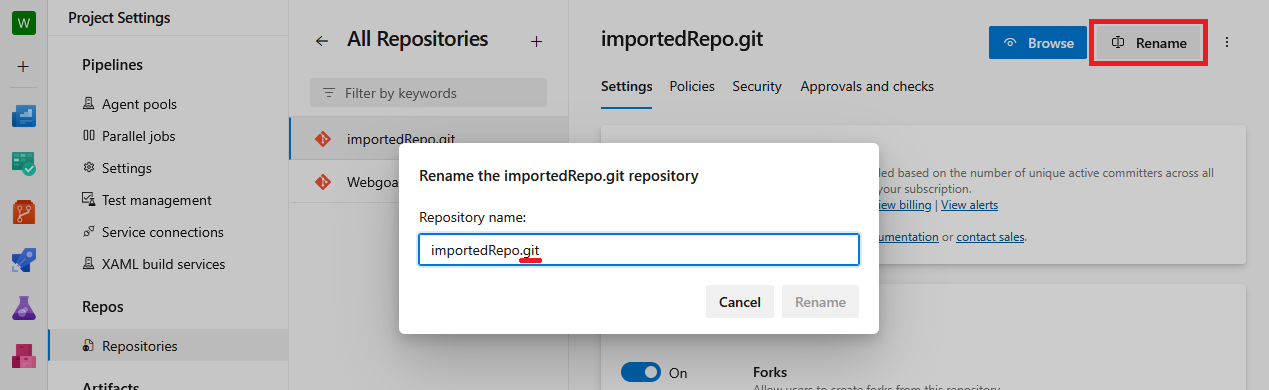
Naming imported repositories
Important: When you import a Git repository from a third-party SCM provider into your Azure DevOps project, Azure DevOps may append ".git" to the end of the repository's name. When this occurs, Polaris will not accept the repository's URL.
To rename an imported repository, follow these steps:
-
Remove ".git" from the repository's name and select Rename.
Connect to a repository in Azure Repos
-
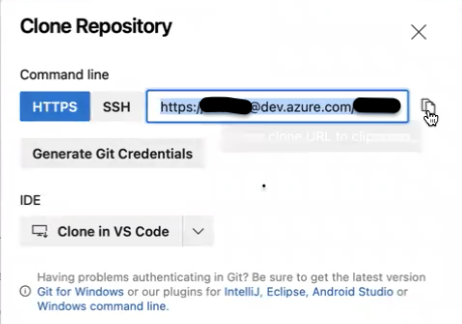
Enter the Repository URL.
To obtain the repository's URL, open the repository in a browser and select Clone. Copy the HTTPS URL (SSH is not supported).
Next steps
Now, you can scan on demand (see How to test from the web UI) or schedule automatic testing on a daily or weekly basis (see Test scheduling policies).
Note: From the Tests screen, before beginning a test manually, make sure to test the connection.